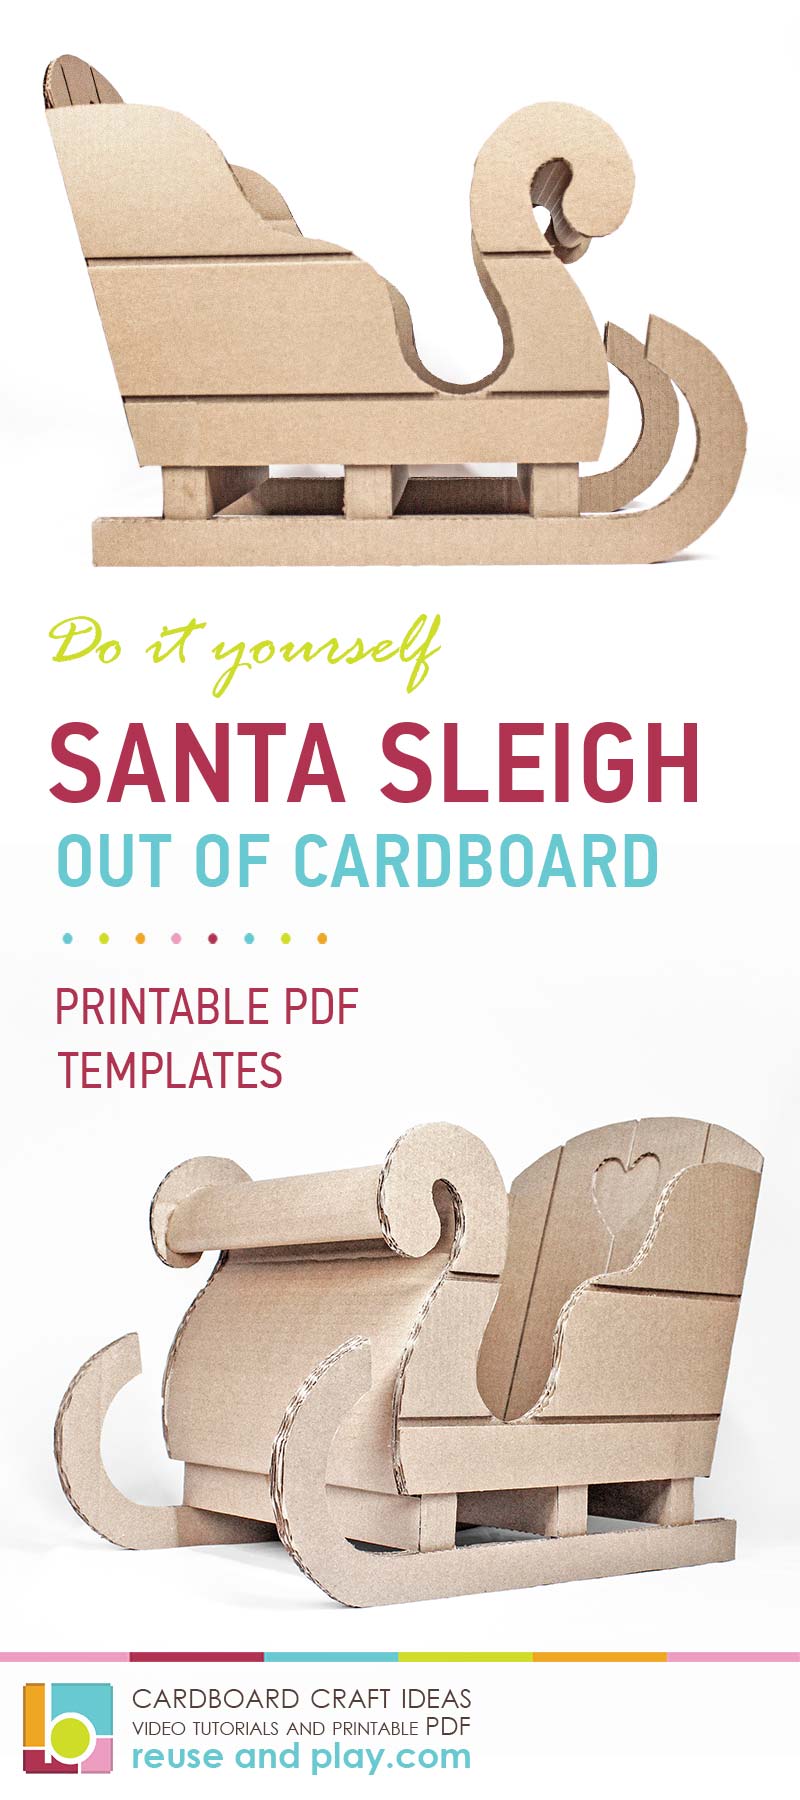
Creating a DIY cardboard Santa sleigh is an excellent way to add festive cheer to your holiday celebrations while enjoying quality time with family and friends. Whether you're a craft enthusiast or simply looking for a fun activity, this project offers endless possibilities for creativity and personalization. With just a few materials and some imagination, you can transform ordinary cardboard into a magical sleigh that will delight children and adults alike.
As the holiday season approaches, many people are searching for unique and budget-friendly ways to enhance their Christmas decorations. DIY projects have gained immense popularity because they allow individuals to express their creativity while saving money. Crafting a cardboard Santa sleigh is one such project that combines affordability, creativity, and fun. It's perfect for beginners and experienced crafters alike, making it an inclusive activity for everyone.
This guide will walk you through everything you need to know about creating your very own DIY cardboard Santa sleigh. From selecting the right materials to decorating your sleigh, we'll cover all the essential steps to ensure your project is a success. Let's dive in and discover how you can bring a touch of holiday magic to your home!
Read also:Hisashi Fotos Capturing The Essence Of Moments
Table of Contents
- Introduction to DIY Cardboard Santa Sleigh
- Materials Needed for Your DIY Santa Sleigh
- Tools You'll Need
- Step-by-Step Guide to Making a Cardboard Santa Sleigh
- Design Ideas for Your Santa Sleigh
- Customizing Your Santa Sleigh
- Safety Tips for Your DIY Project
- Cost Breakdown for Your Santa Sleigh
- Tips for Success
- Conclusion
Introduction to DIY Cardboard Santa Sleigh
The idea of crafting a DIY cardboard Santa sleigh has become increasingly popular among families and craft enthusiasts. This project is not only cost-effective but also environmentally friendly, as it encourages the reuse of materials that would otherwise be discarded. Additionally, it fosters creativity and allows individuals to personalize their sleighs according to their preferences.
One of the most appealing aspects of this project is its accessibility. Almost anyone can create a cardboard Santa sleigh with minimal experience in crafting. All you need is a bit of patience, creativity, and the right materials. Whether you're planning to use it as a decorative piece or as part of a holiday-themed play area for children, a DIY Santa sleigh is sure to be a hit.
Moreover, this project aligns perfectly with the holiday spirit of giving and sharing. By involving family members in the creation process, you can strengthen bonds and create lasting memories. Let's explore the materials and tools you'll need to get started on your DIY cardboard Santa sleigh journey.
Materials Needed for Your DIY Santa Sleigh
Cardboard Selection
Choosing the right type of cardboard is crucial for the success of your DIY Santa sleigh. You'll want to select sturdy corrugated cardboard that can support the structure of the sleigh. Look for boxes that are clean and free from damage. Large appliance boxes are often ideal for this type of project.
Paint and Decorative Materials
- Acrylic paint in festive colors such as red, green, and white
- Paintbrushes of various sizes
- Decorative items like glitter, ribbons, and stickers
- Fabric or felt for additional texture
These materials will help bring your sleigh to life and make it visually appealing. Consider using eco-friendly paints and decorations to align with sustainable practices.
Tools You'll Need
Having the right tools on hand will make your DIY cardboard Santa sleigh project much easier. Here's a list of essential tools you'll need:
Read also:How Short Is Jordan Chiles Discovering The Height And Impact Of The Rising Gymnast Star
- A craft knife or box cutter for cutting cardboard
- A ruler or measuring tape for precise measurements
- A pencil for marking cutting lines
- A hot glue gun for assembling parts
- Scissors for cutting fabric or decorations
These tools will ensure that your sleigh is constructed accurately and securely. Always handle sharp tools with care to avoid accidents.
Step-by-Step Guide to Making a Cardboard Santa Sleigh
Now that you have your materials and tools ready, let's dive into the step-by-step process of creating your DIY cardboard Santa sleigh.
Step 1: Design Your Sleigh
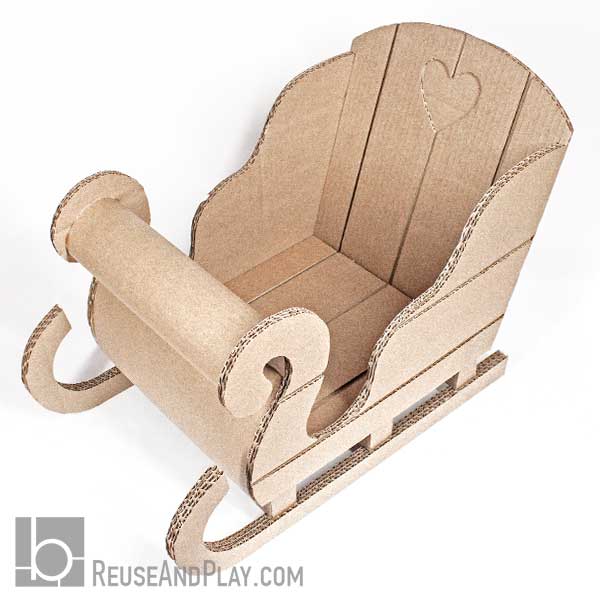
Begin by sketching out your sleigh design on paper. Decide on the size and shape you want for your sleigh. A traditional sleigh shape typically includes a curved front and straight sides.
Step 2: Cut the Cardboard
Using your craft knife or box cutter, carefully cut out the pieces of your sleigh according to your design. Be sure to follow your measurements precisely to ensure a proper fit.
Step 3: Assemble the Sleigh
Once all the pieces are cut, use your hot glue gun to assemble the sleigh. Start by attaching the sides to the base, then add the front and back pieces. Allow the glue to dry completely before moving on to the next step.
Step 4: Paint and Decorate
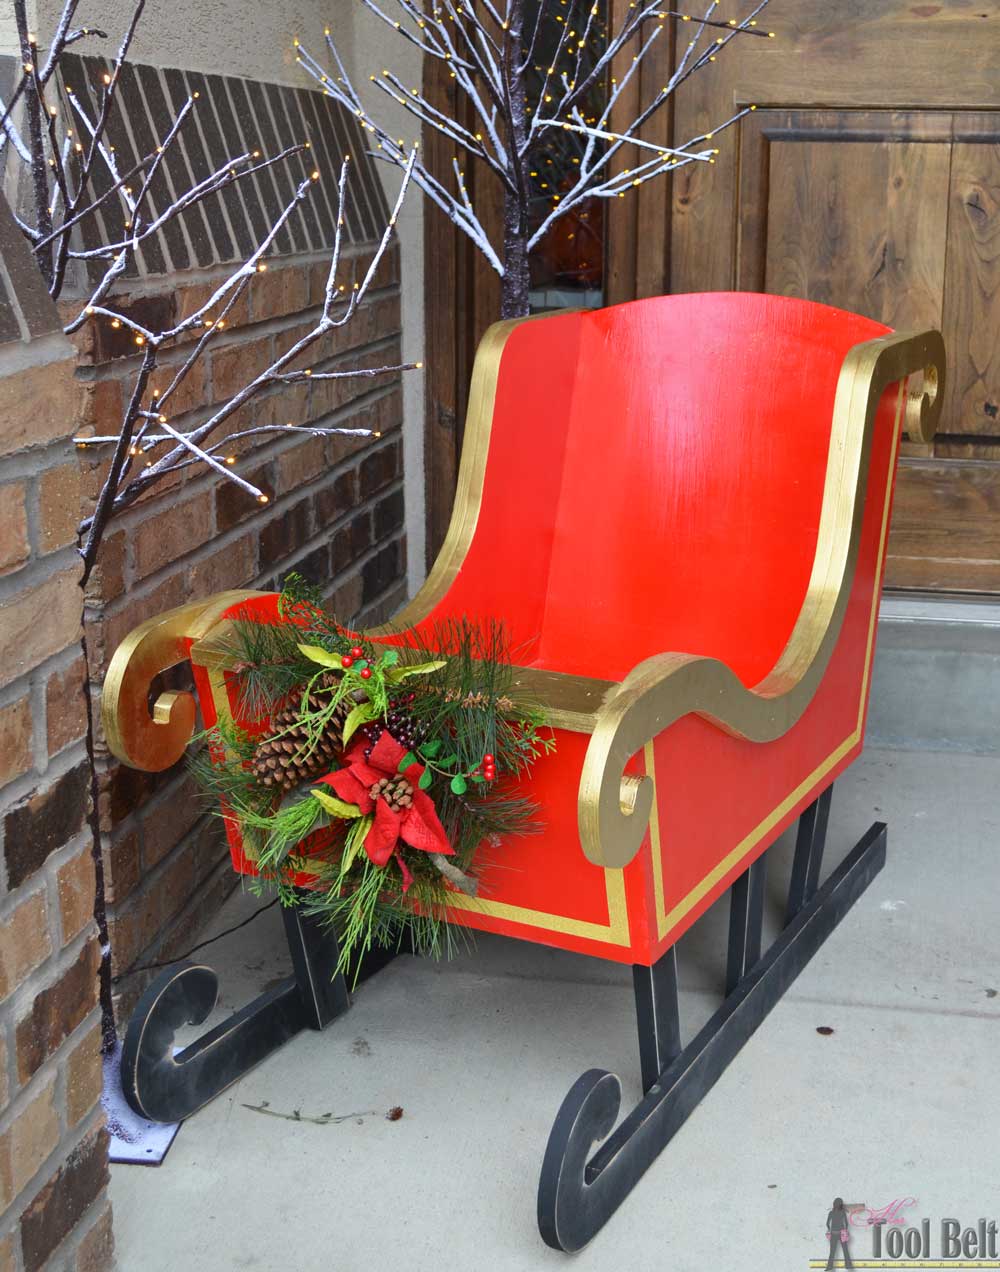
Now it's time to bring your sleigh to life with paint and decorations. Apply your chosen colors and let them dry before adding any additional embellishments. Get creative with your decorations to make your sleigh stand out!
Design Ideas for Your Santa Sleigh
There are countless ways to design your DIY cardboard Santa sleigh. Here are a few ideas to inspire you:
- Create a traditional sleigh with a curved front and decorative reins
- Add a snowy texture using white paint and cotton balls
- Incorporate LED lights for a magical glow
- Personalize your sleigh with names or special messages
Feel free to mix and match these ideas or come up with your own unique design. The possibilities are endless!
Customizing Your Santa Sleigh
Customizing your DIY cardboard Santa sleigh allows you to make it truly one-of-a-kind. Consider the following customization options:
Add Personal Touches
Incorporate family names, initials, or special dates to make your sleigh meaningful to you and your loved ones.
Use Unique Decorations
Experiment with different textures and materials, such as faux fur or metallic paints, to give your sleigh a luxurious look.
Safety Tips for Your DIY Project
Safety should always be a priority when working on any DIY project. Here are some tips to keep in mind:
- Wear protective gloves when handling sharp tools
- Work in a well-ventilated area when using paints or adhesives
- Keep tools and materials out of reach of children
By following these safety guidelines, you can ensure a safe and enjoyable crafting experience.
Cost Breakdown for Your Santa Sleigh
One of the greatest advantages of creating a DIY cardboard Santa sleigh is its affordability. Here's a rough cost breakdown based on typical materials and tools:
- Cardboard: Free (if using recycled materials)
- Acrylic paint: $5-$10
- Decorative items: $10-$20
- Tools (if not already owned): $15-$30
Overall, you can create a stunning sleigh for under $50, making this project an excellent choice for those on a budget.
Tips for Success
To ensure your DIY cardboard Santa sleigh project is a success, consider the following tips:
- Take your time with each step to achieve the best results
- Experiment with different designs and decorations to find what works best for you
- Involve family members or friends for a collaborative crafting experience
Remember, the key to a successful project is patience and creativity. Enjoy the process and have fun!
Conclusion
Crafting a DIY cardboard Santa sleigh is a wonderful way to celebrate the holiday season while fostering creativity and spending quality time with loved ones. By following the steps outlined in this guide, you can create a beautiful and personalized sleigh that will enhance your holiday decor. Remember to prioritize safety, use high-quality materials, and let your imagination run wild!
We encourage you to share your completed sleigh on social media and tag us so we can see your creative masterpiece. Don't forget to explore our other DIY holiday projects for even more festive ideas. Happy crafting, and Merry Christmas!